
In December 1940, British forces in North Africa kicked off their first real offensive against Italian troops who’d invaded Egypt a few months earlier. What started as a quick five-day raid turned into one of the early war’s most decisive Allied wins.
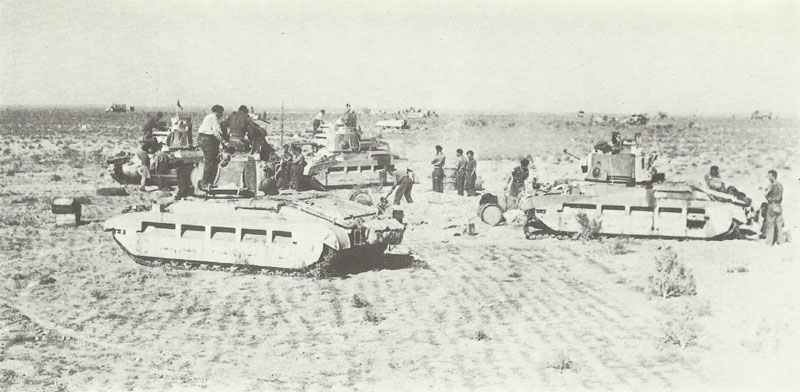
Operation Compass absolutely shattered Italian forces: just 36,000 British Commonwealth troops managed to defeat 150,000 Italian and Libyan soldiers, taking over 138,000 prisoners while losing only 1,900 of their own.
The campaign played out across the brutal Western Desert. British commanders took advantage of Italian weaknesses with better tactics, technology, and coordination.
Lieutenant-General Richard O’Connor led the Western Desert Force. His troops pushed the Italians out of Egypt and deep into Libya, grabbing key coastal ports and wiping out the Italian 10th Army.

Careful planning, smart use of armored warfare, and the Italian army‘s issues with equipment and leadership all played into the Allied victory.
Strategic Importance of North Africa in World War II
North Africa really mattered in World War II because it controlled key shipping routes and access to resources. The region sat at a crossroads, linking Europe, Asia, and Africa, and gave access to Middle Eastern oil.
Control of the Suez Canal and Mediterranean
The Suez Canal was Britain’s lifeline to its empire and Asian colonies. This slim waterway linked the Mediterranean to the Red Sea and gave the shortest route between Europe and India.
If you controlled the canal, you controlled Britain’s ability to move troops and supplies. The British Empire relied on it for trade and military moves.
Losing the canal would’ve forced ships to take the long way around Africa. The Mediterranean itself was a huge naval battleground, and both sides needed those ports to keep supply lines open.
Egypt’s location gave Britain a base to project power. If the Axis took North Africa, they’d cut off Britain’s connection east and isolate its forces in the Middle East and India.
Access to Oil Supplies and Trade Routes
By 1940, oil was everything for modern armies. Tanks, planes, trucks—all needed fuel, and the Middle East had the world’s biggest oil reserves.
Britain fielded the first fully mechanized army, making it even more dependent on Middle Eastern oil. German and Italian forces wanted those resources too.
Trade routes through North Africa connected Europe to raw materials from Asia and Africa. Whoever controlled ports in Libya and Egypt could decide who got those supplies.
The Axis wanted to grab those oil fields and trade routes. If they’d pulled it off, their war effort would’ve gotten a serious boost, and Britain would’ve been in trouble.
Role of Egypt and Libya in the Conflict
Egypt worked as Britain’s main base in the region. It held large British military forces and equipment.
Cairo became the headquarters for Middle Eastern operations. Libya, meanwhile, gave Italy a launchpad for attacks on Egypt.
Italian forces in Libya threatened the Suez Canal, and the colony offered possible access to the Nile valley. Both countries had long Mediterranean coastlines, dotted with important ports.
Airfields in Egypt and Libya fueled air campaigns. The desert between them became a natural battlefield, perfect for tank warfare but brutal on supply lines.
Events Leading Up to Operation Compass
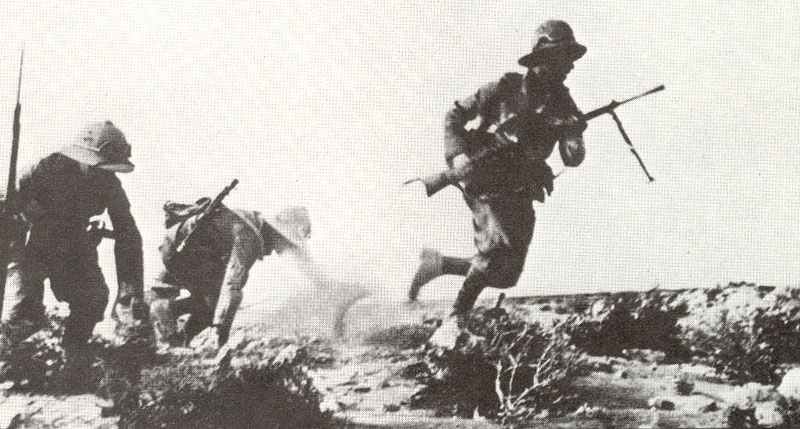
Italy’s declaration of war in June 1940 changed North Africa into a major front. Marshal Rodolfo Graziani led the Italian advance into Egypt, while Britain scrambled to defend its key positions near the Nile Delta.
Italian Ambitions and the Invasion of Egypt
Italy declared war on Britain and France on June 10, 1940. Mussolini wanted to expand Italian control in North Africa and threaten British interests in Egypt.
Libya, as an Italian colony, provided the staging ground for attacks. Graziani took over Italian command in North Africa after Governor-General Italo Balbo was killed by friendly fire in June 1940.
On September 13, 1940, the Italian 10th Army launched Operation E. Italian troops pushed about 95 kilometers into Egypt in just three days, stopping at Maktila, 16 kilometers past Sidi Barrani.
- 150,000 infantry troops
- 1,600 artillery guns
- 600 tanks and tankettes
- 331 aircraft
The Italians set up five fortified camps around Sidi Barrani, stretching from Maktila on the coast down to camps at Tummar East, Tummar West, Nibeiwa, and Sofafi.
Graziani had doubts about his large but non-mechanized force. He saw that British troops, though fewer, had better mobility and equipment for desert fighting.
British Defensive Preparations
Britain faced the Italian threat in Egypt with pretty limited resources. General Archibald Wavell commanded Middle East forces, with only about 36,000 soldiers ready for desert action.
Lieutenant-General Richard O’Connor led the Western Desert Force, which included the 4th Indian Infantry Division and the 7th Armoured Division as main combat units.
As the Italians advanced, British forces pulled back from forward positions. The small garrison at Sollum withdrew to defensive lines east of Mersa Matruh.
British Equipment Advantages:
- Cruiser tanks with 2-pounder guns
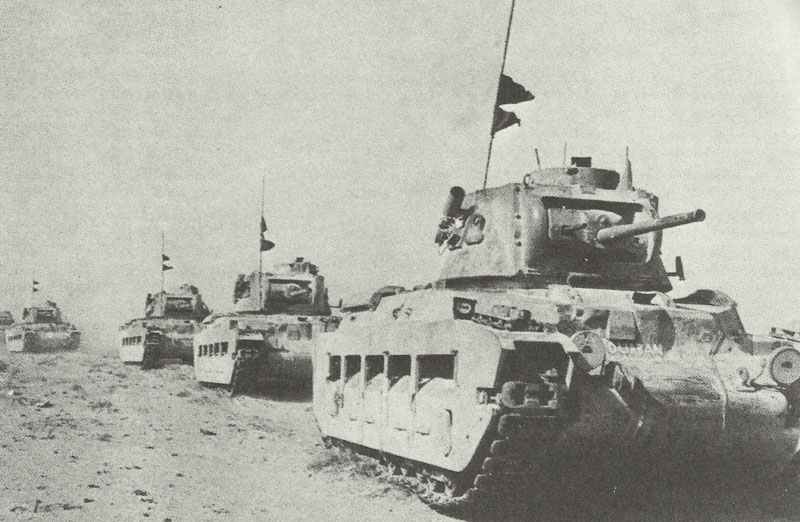
- Matilda II infantry tanks with thick armor
- Superior mobility and mechanization
- 162 RAF aircraft, including Hurricanes and Wellingtons
The Royal Air Force kept air superiority with modern fighters. Hurricane and Gladiator squadrons covered the skies while Blenheim and Wellington bombers hit Italian positions.
British submarines and navy ships targeted Italian supply lines. HMS Parthian attacked ships in Tobruk harbor, and Royal Navy cruisers shelled coastal positions.
Challenges of Desert Warfare
Desert warfare was a nightmare for both sides. Water supplies, mechanical breakdowns, and navigation made every operation a gamble.
Italian supply lines stretched all the way back to Tripoli. The Via della Vittoria road extension helped a bit, but British air and naval attacks made it risky.
Sand chewed up engines and equipment, while wild temperature swings wore down both men and machines. Vehicle maintenance was a constant headache.
Desert Warfare Factors:
- Limited water sources
- Extreme temperature swings
- Navigation headaches
- Supply line risks
- High vehicle breakdown rates
The British adapted better to mobile desert tactics. Their mechanized units could hit fast and pull out before Italian reinforcements showed up.
The Italians, on the other hand, built static camps around Sidi Barrani, leaving them isolated. Once the British spotted weak points, those camps became easy targets.
Planning and Objectives of the Allied Offensive
British commanders mapped out Operation Compass as a five-day raid on Italian positions in Egypt. Lieutenant-General Richard O’Connor led the Western Desert Force, aiming to shove the Italians back into Libya.
Development of British Strategy
General Archibald Wavell ordered up plans for Operation Compass after the Italians pushed into Egypt in September 1940. The idea was to hit the Italian camps around Sidi Barrani in a limited raid, then get out.
British planners spotted major flaws in the Italian defenses. The five fortified camps—from Maktila on the coast to Sofafi on the escarpment—were too spread out to help each other.
The British decided to attack through the Sofafi-Nibeiwa gap. This approach let them hit the Italian camps from their weaker western sides, using infantry backed by tanks for coordinated strikes.
Key Strategic Elements:
- Attack Italian camps from the northwest (the softest spot)
- Use the 7th Support Group to block Italian interference
- Coordinate naval bombardment with ground assaults
- Keep it all secret as long as possible
Wavell wanted his troops “prepared morally, mentally and administratively” to take advantage of any big opening that came up. Wise words, honestly.
The Western Desert Force and Allied Troops
Lieutenant-General Richard O’Connor commanded about 36,000 men in the Western Desert Force. The force was a mix of divisions and units from all over the British Empire.
The 4th Indian Infantry Division, under Major-General Noel Beresford-Peirse, handled the main infantry role. From December 14, the 6th Australian Infantry Division under Major-General Iven Giffard Mackay swapped in when the Indian division went to East Africa.
The 7th Armoured Division, led by Major-General Sir Michael O’Moore Creagh, brought the real punch. This division fielded Cruiser tanks and a battalion of Matilda II tanks that Italian weapons couldn’t scratch.
Force Composition:
- Infantry: 4th Indian Division, then 6th Australian Division
- Armor: 7th Armoured Division with 275 tanks
- Artillery: 120 guns
- Air Support: 162 RAF aircraft, including Hurricane fighters and Wellington bombers
Commonwealth troops came from Britain, India, Australia, and other Empire territories. This mix brought experience and modern gear that outclassed the Italian forces.
Key Commanders and Leadership Roles
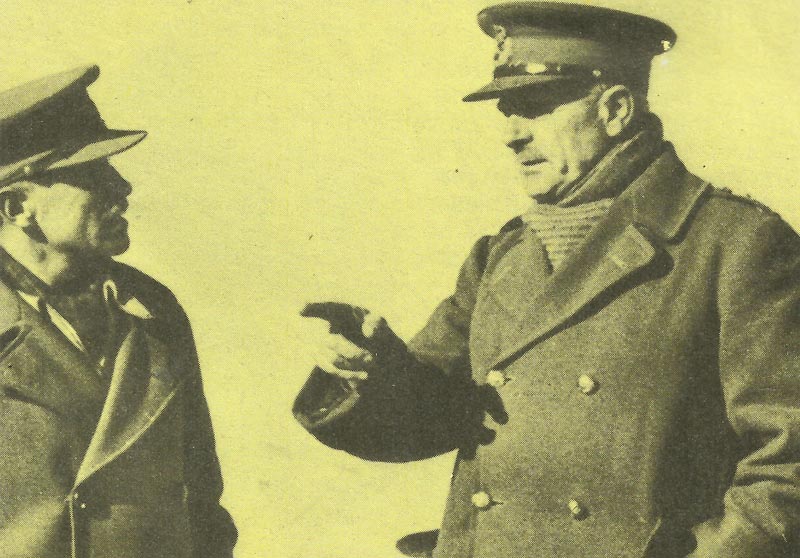
Lieutenant-General Richard O’Connor led the Western Desert Force as the main field commander. He came up with the tactical plans and coordinated the multi-division attack on Italian positions.
General Archibald Wavell commanded Middle East Command and gave the order for the operation. Wavell originally wanted a limited raid but kept his forces ready to push further if things went well.
He worked with Lieutenant-General Sir Henry Maitland Wilson to shape the operational framework.
Command Structure:
- Overall Command: General Archibald Wavell (Middle East Command)
- Field Command: Lieutenant-General Richard O’Connor (Western Desert Force)
- Planning Coordination: Lieutenant-General Sir Henry Maitland Wilson (British Troops Egypt)
The commanders kept preparations tightly under wraps. Only a handful of officers knew the true objectives during training exercises in late November 1940.
Troops only learned about the actual operation on December 7 as they moved into position.
O’Connor and his divisional commanders worked closely with RAF and Royal Navy units. This joint planning meant air attacks on Italian airfields and naval bombardments lined up with the ground assault.
Timeline and Major Battles of Operation Compass
Operation Compass played out in four phases from December 1940 to February 1941. British forces scored big at Nibeiwa, Sidi Barrani, Bardia, and Tobruk before chasing the Italians to defeat at Beda Fomm.
Battle of Nibeiwa and Aerial Reconnaissance
The offensive kicked off on December 9, 1940, with British troops moving through the Ebna Gap under cover of RAF bombing. The 7th Royal Tank Regiment took up position northwest of Nibeiwa Camp during the night of December 7-8.
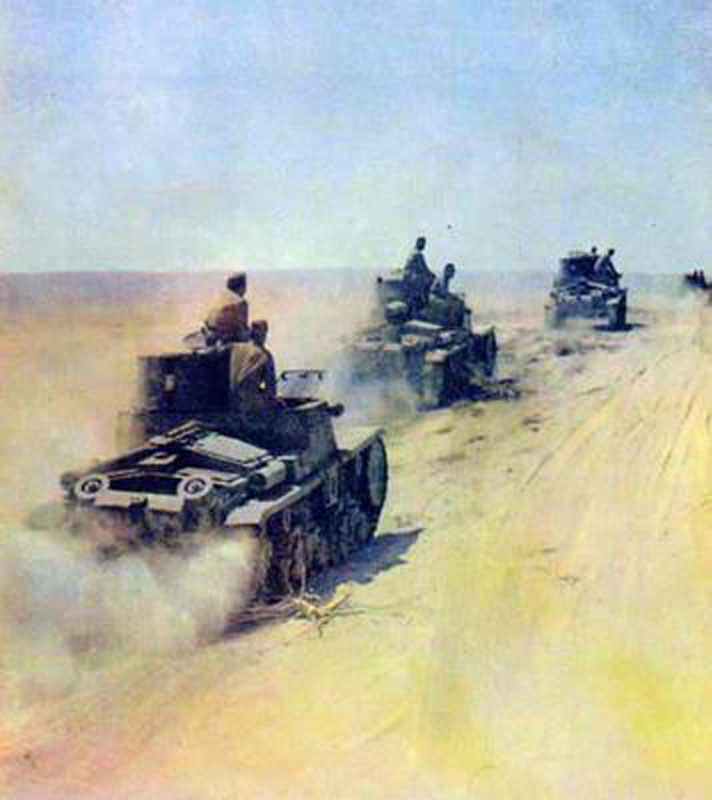
At dawn the next day, British Matilda tanks caught 23 Italian M-11 tanks off guard near the camp. The Matildas, heavily armored and honestly kind of intimidating, dominated this tank clash.
Italian crews barely had time to react. The attack on Nibeiwa Camp started at first light.
The camp, about 1.5 by 1 mile, had stone defensive walls and artillery posts. But those fortifications just couldn’t slow the advancing Matildas.
Key Results:
- Camp captured by 10:40 AM
- Several thousand Italian prisoners taken
- Italian tank force destroyed
- British forces gained momentum
Aerial reconnaissance gave the British crucial intelligence about Italian defenses. That victory at Nibeiwa really showed how well tanks and infantry could work together when it counted.
Capture of Sidi Barrani
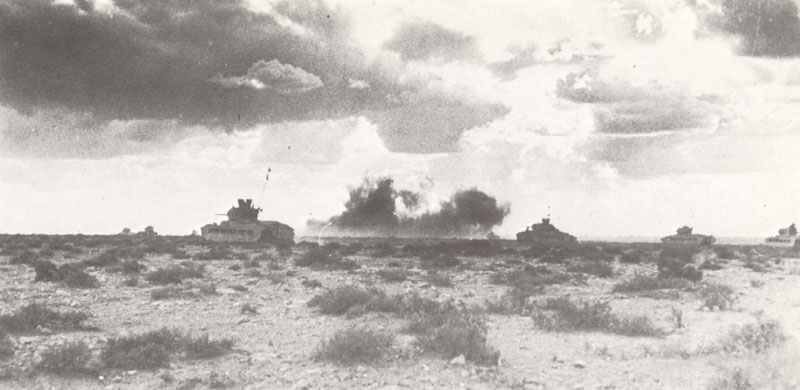
After Nibeiwa fell, British forces moved toward Sidi Barrani and the Tummar camps. The 7th Royal Tank Regiment ran into sandstorms and minefields, losing seven tanks along the way.
The attack on Tummar West started at 1:35 PM on December 9. Matilda tanks went head-to-head with Italian artillery, and the 1st Battalion Royal Fusiliers pushed in behind them.
Italian troops at Tummar put up a tougher fight than at Nibeiwa. Artillery crews kept firing until British tanks overran their positions.
The camp fell after some intense fighting.
Tummar Operations:
- Tummar West captured December 9
- Tummar East fell after a demonstration attack
- Coast road cut by 11th Hussars
- Water supplies and communications severed
Sidi Barrani itself fell to the 16th British Brigade. That wrapped up the first phase of Operation Compass, knocking out the Italian forward positions in Egypt.
Battle of Bardia and Fall of Tobruk
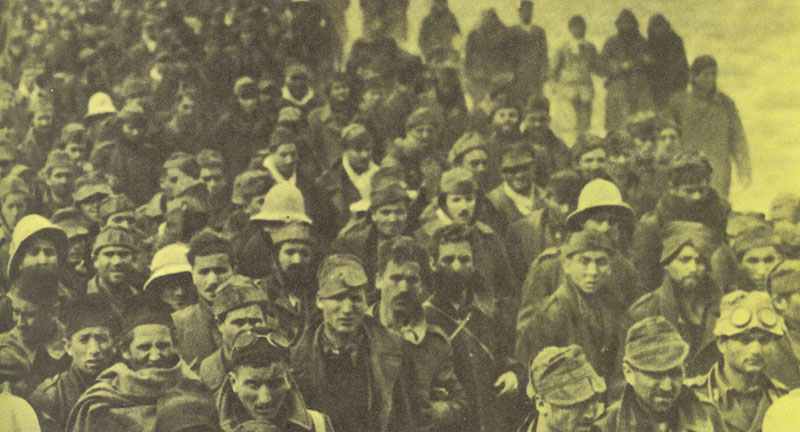
The siege of Bardia started in late December 1940 as British forces chased retreating Italians into Libya. This fortified port city stood as a major hurdle for the British advance.
Australian infantry led the assault on Bardia’s outer defenses. Tank support broke through Italian lines, and after fierce fighting, the garrison surrendered.
Bardia Results:
- 45,000 prisoners captured
- Large quantities of artillery seized
- Strategic port secured for Allied use
- Path to Tobruk opened
Tobruk fell on January 22, 1941, after a short siege. The port’s capture gave the British a vital supply base.
During the Tobruk operation, they took over 25,000 Italian prisoners.
With the fall of these two ports, organized Italian resistance in Cyrenaica pretty much ended. The British had taken the Italian 10th Army’s main defensive positions along the coast.
Pursuit to Beda Fomm and the Collapse of Italian Forces
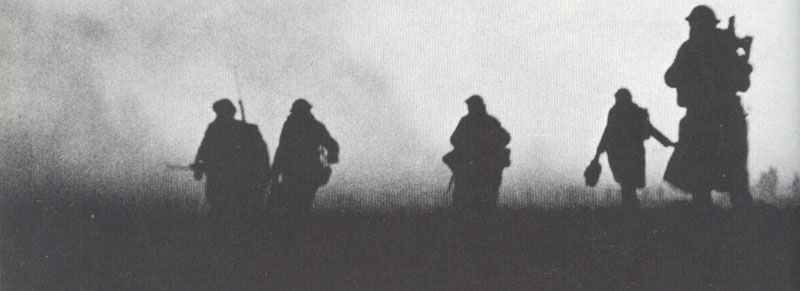
British forces launched a fast pursuit across the desert to cut off retreating Italians. The 7th Armoured Division raced over tough terrain to reach the coast road near Beda Fomm.
Between February 5 and 7, 1941, the decisive battle unfolded at Beda Fomm. British tanks blocked the Italian retreat, and artillery hammered the enemy columns.
Italian troops found themselves trapped between British positions and the sea.
Final Battle Statistics:
- 20,000 Italian prisoners captured
- 120 tanks destroyed or captured
- 216 guns seized
- Italian 10th Army eliminated
General Bergonzoli surrendered what was left of the 10th Army. The Battle of Beda Fomm finished off Italian forces in eastern Libya.
British troops rolled into Benghazi and advanced to El Agheila. They ended up capturing over 138,000 Italians and Libyans in just two months.
Logistics, Technology, and Combat in the Western Desert
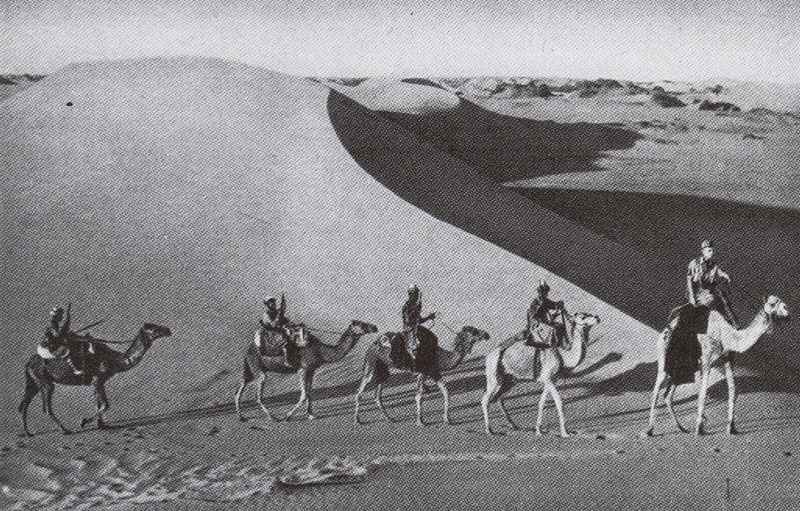
The brutal North African desert forced both sides to rethink their tactics and gear. Supply problems, wild weather, and the demands of mechanized warfare shaped every part of the campaign.
Supply Lines and Transportation Challenges
Supply lines really kept Operation Compass alive. The British Western Desert Force had to rely on long chains stretching all the way back to Alexandria and Cairo.
Water requirements dominated every bit of logistics planning. Each soldier needed at least a gallon a day in the heat, and vehicles guzzled fuel across those endless distances.
The British set up supply depots at key points along their advance. These depots held ammo, fuel, food, and spare parts.
Without those, troops had to carry everything themselves, which wasn’t exactly ideal.
Transportation methods included:
- Motor transport companies with trucks
- Railways where possible
- Camel trains for rough terrain
- Air drops for isolated units
Italian supply lines were a lot more fragile. The British targeted Italian convoys and depots, disrupting their operations and making counterattacks almost impossible.
With the mobile nature of desert fighting, supply columns sometimes traveled hundreds of miles. If a vehicle broke down, it could strand a whole unit—recovery crews had their hands full.
Role of Tanks and Artillery
British armored units really had the edge over the Italians. They brought about 380 tanks to face 600 Italian ones, but quality beat quantity here.
British tank advantages:
- Better armor protection
- More reliable engines
- Superior crew training
- Effective communication systems
Most Italian weapons couldn’t even scratch British armor. Italians lacked solid anti-tank guns and couldn’t stop British advances.
British artillery coordination improved as the operation went on. Gunners gave solid support to infantry attacks, using wireless radios to direct fire with surprising accuracy.
The 2-pounder gun armed British tanks and served as the main anti-tank weapon. It worked well against Italian armor but didn’t offer much in the way of high-explosive power.
Tank recovery teams worked constantly to get damaged vehicles back into action. That job never really let up during these drawn-out battles.
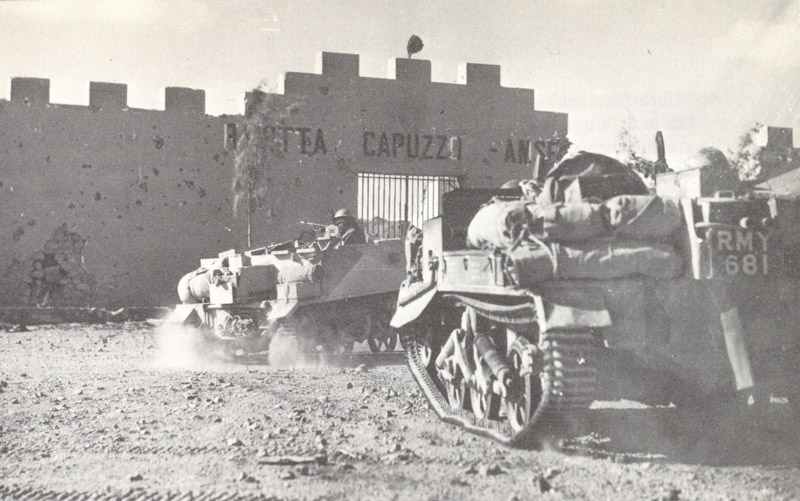
Environmental Factors: Sandstorms, Heat, and Haze
Desert conditions made everything harder. Daytime temperatures soared past 120°F, then plummeted at night.
Sandstorms sometimes dropped visibility to zero and grounded aircraft for days. These storms could wreck carefully planned operations, and sand got into everything—engines, weapons, you name it.
Heat haze made it tough to spot or identify targets. Gunners struggled to judge distances in the shimmering air, and navigation without clear landmarks? Good luck.
Environmental impacts:
- Engine filters clogged with sand
- Weapons jammed from dust
- Radios failed in the heat
- Water supplies evaporated quickly
Metal surfaces got too hot to touch by midday. Crews had to do maintenance early or late in the day to avoid burns.
Breakdowns spiked in the extreme heat. Cooling systems overheated, and tires blew out on the hot sand more often than anyone liked.
Medical Services and Living Conditions
Medical teams adapted as best they could to desert warfare. Heat exhaustion and dehydration became constant threats for everyone.
Field hospitals set up treatment centers behind the front lines. Evacuating wounded soldiers meant long trips by ambulance or even aircraft when available.
Common medical issues:
- Heat stroke and dehydration
- Sand fly fever
- Dysentery and stomach problems
- Eye infections from sand
Living conditions weren’t great. Tents barely shielded anyone from the heat, and food spoiled fast.
With water so limited, soldiers rationed it for drinking, not washing. That led to skin problems and other health headaches.
Sleeping in the heat proved tough. Troops often worked at night to dodge the worst of it, but that just messed with everyone’s rest and made people cranky.
Food shortages meant irregular meals and not much variety. Canned rations dominated, but even those needed water to prepare, which wasn’t always available.
Consequences and Significance of the Allied Victory
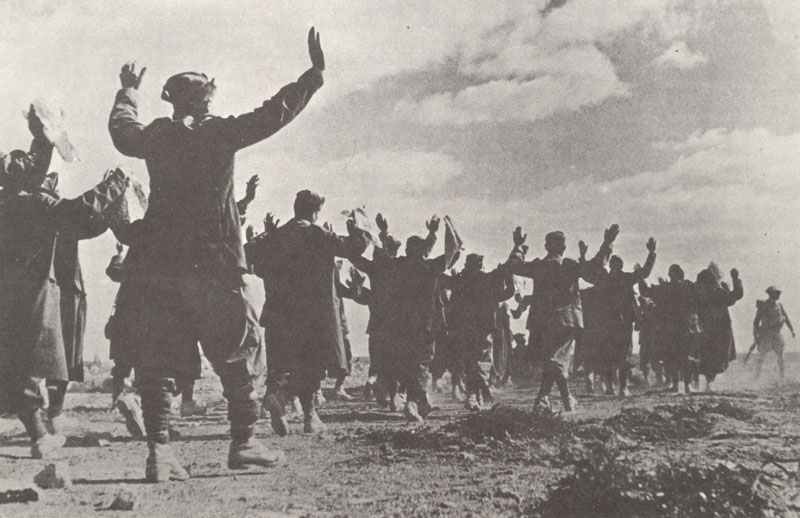
Operation Compass brought the first big Allied land victory of World War II, smashing eight Italian divisions and capturing 138,000 prisoners for minimal losses. That kind of overwhelming win flipped the balance of power in North Africa and really exposed just how shaky the Axis forces were out there.
Impact on Axis Powers and Italian Morale
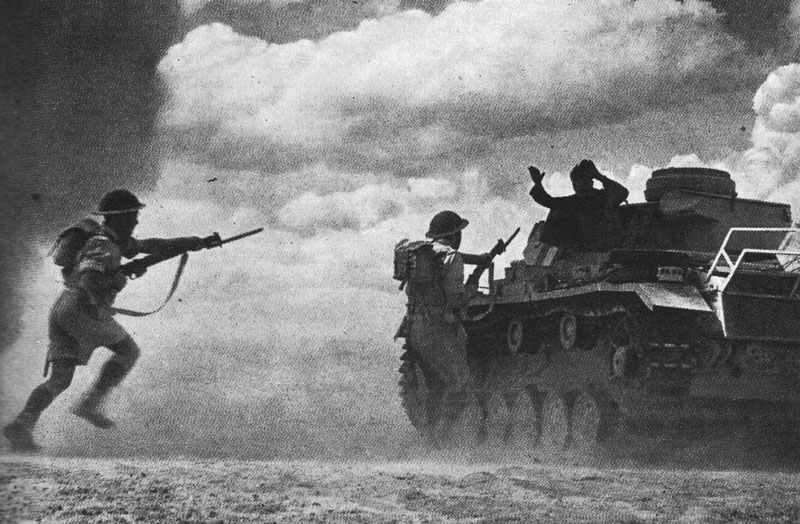
Italian forces lost all fighting spirit during Operation Compass. They surrendered in droves—one Australian officer and eight men even managed to take 2,000 prisoners hiding in a cave. In another case, a single private rounded up thirty prisoners with just a bayonet. Incredible, honestly.
The sheer scale of surrenders stunned both sides. Foreign Secretary Anthony Eden even flipped Churchill’s famous Battle of Britain quote, writing, “Never before has so much been surrendered by so many to so few.”
Marshal Graziani complained to Mussolini that his army was “a flea against an elephant,” even though they started with an eight-to-one advantage. The defeats revealed poor training, outdated gear, and a general lack of enthusiasm for the fight among Italian troops.
The Italian Air Force took a major hit after the Allies captured the El Adem airfield and repair depot. That loss made it even harder for the Axis to support their ground troops effectively.
Territorial Gains and Large-Scale Surrenders
Allied forces captured 138,000 Italian prisoners during the two-month campaign. They suffered only minimal casualties in the process.
The Western Desert Force pushed Italian troops out of Egypt and eastern Libya. Their advance covered over 500 miles across the desert.
Key territorial gains included:
- Sidi Barani: 38,000 prisoners, 237 guns, 73 tanks
- Bardia: 38,000 prisoners, 500 guns, 120 tanks, 700 vehicles
- Tobruk: Major supply port and naval base secured
- Benghazi: Strategic port city with 65,000 population captured
The Allies wiped out the entire Italian 10th Army. They grabbed enough equipment and supplies to keep their offensive going.
At Tobruk alone, they seized two months’ worth of food. Those material gains made a real difference in the harsh desert.
Strategic Implications for the North African Campaign
Operation Compass gave the Allies control of the Western Desert. They secured key Mediterranean shipping routes.
This victory kept the Suez Canal safe from Axis capture. Losing the canal would have split the British Empire in half—a nightmare scenario.
Britain finally got its first big land win against the Axis. After Dunkirk and the Blitz, people needed proof that German and Italian forces could be beaten.
The campaign showed the value of better training, equipment, and leadership in desert warfare. British Matilda tanks shrugged off Italian weapons, and Allied troops moved with more speed and flexibility.
But the win came at a cost. Allied supply lines stretched thin, and General Wavell had to send troops to Greece and other hotspots.
That left North Africa short on reinforcements. Soon, the German Afrika Korps would take advantage and claw back much of the ground the Allies had gained.
Aftermath and Legacy of Operation Compass
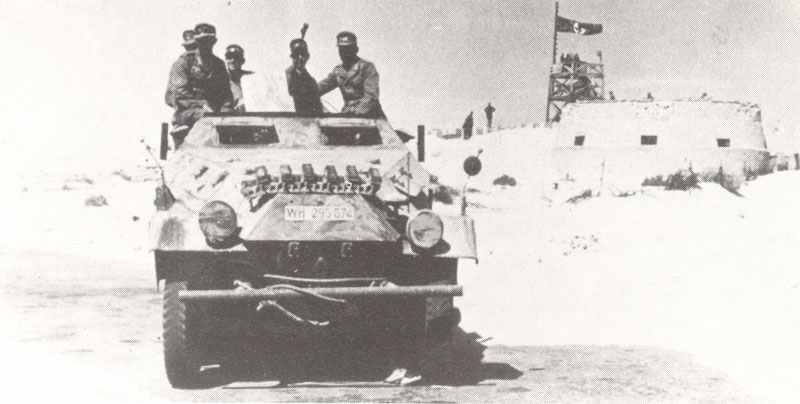
Operation Compass turned North Africa from an Italian backwater into a major Axis-Allied battleground. The British victory forced Germany to send elite troops under General Erwin Rommel, changing everything and setting up two years of desert warfare that would end in Allied victory across French North Africa.
Arrival of Erwin Rommel and the Afrika Korps
After Italy’s defeat, Hitler sent the Deutsches Afrikakorps to North Africa in February 1941. General Erwin Rommel landed in Tripoli on February 12, 1941, tasked with stopping a total Italian collapse.
The Afrika Korps started out with the 15th Panzer Division and 5th Light Division. Rommel brought fresh German tactics, better gear, and a new kind of leadership the British hadn’t faced in the desert yet.
By March 1941, Rommel ignored orders to stay defensive and went on the attack. His forces quickly retook most of the territory the British had just won.
The British got pushed all the way back to the Egyptian border in just a few weeks. It was a stunning turnaround.
Operation Compass had overstretched British resources. When Wavell sent experienced units to Greece, green troops had to hold the line in North Africa—and it showed.
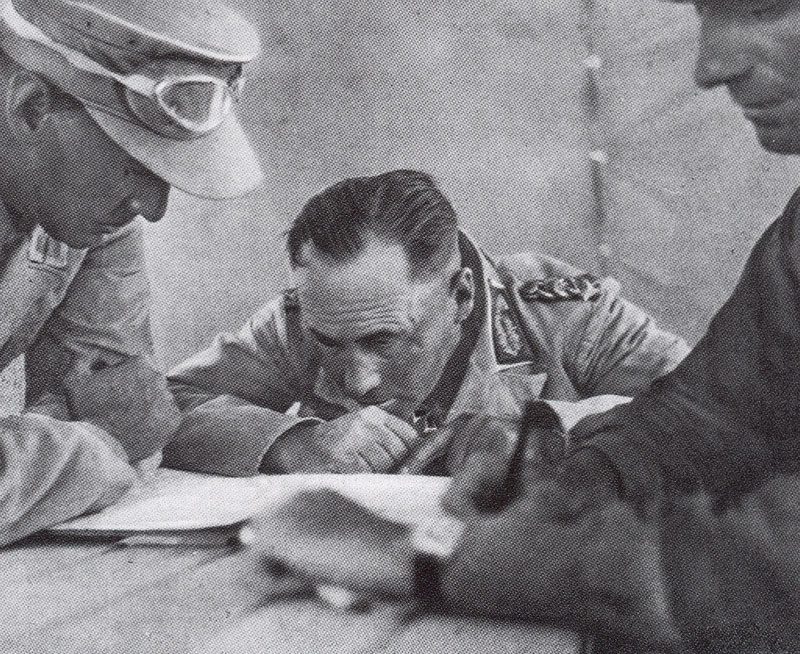
Shift in Balance: Siege of Tobruk and Operation Crusader
Rommel’s attack trapped the Australian garrison at Tobruk in April 1941. The Siege of Tobruk dragged on for 241 days, becoming a symbol of Allied stubbornness.
The British tried to break the siege with Operation Crusader in November 1941. This time, they faced a much tougher and more experienced enemy.
Operation Crusader hit some rough patches at first. But by December 1941, the Allies managed to relieve Tobruk.
Rommel struck back in January 1942, forcing the British to retreat yet again. The back-and-forth was relentless.
The Battle of Gazala in May-June 1942 marked Rommel’s biggest win. He took Tobruk and pushed to within 60 miles of Alexandria before the Allies dug in at the First Battle of El Alamein in July 1942.
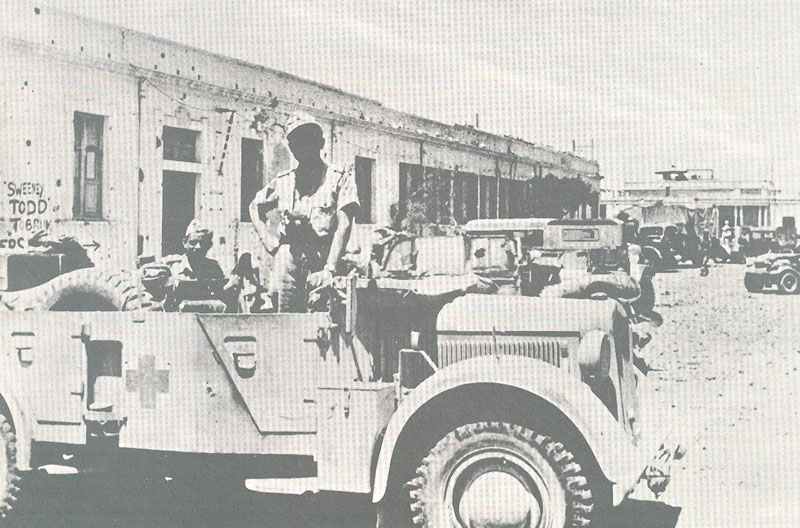
Influence on Subsequent Desert Operations
Operation Compass set the tone for desert fighting until 1943. Fast advances were possible, but holding ground without steady supplies? Not so much.
The Second Battle of El Alamein in October 1942 finally broke Rommel’s back. Montgomery put lessons from earlier campaigns to good use, relying on sheer material advantage.
Operation Torch kicked off in November 1942, opening new fronts in Algeria and Morocco. The Allies closed in from both east and west, trapping Axis forces between them.
Fighting in Tunisia from 1942-1943 included battles at Kasserine and the siege of Tunis. These campaigns wrapped up the Allied conquest of North Africa, which had started with Operation Compass.
Allies kept using tactics developed during Operation Compass throughout the Mediterranean. Combined arms and fast exploitation of breakthroughs became their go-to moves.
Frequently Asked Questions
Operation Compass brings up a lot of questions about Allied strategy, military organization, and its wider impact on World War II. People wonder about the operation’s goals, the forces involved, and how it changed the North African theater.
What were the major strategic objectives of the Allies during Operation Compass?
The Allies needed to protect the Suez Canal from the Axis. If they’d lost it, the British Empire would have been split in two.
They also aimed to control Mediterranean shipping routes. Securing supply lines and protecting Malta were top priorities.
North Africa gave Britain its only real shot at a land war against Germany and Italy. After Dunkirk and the Blitz, Allied leaders desperately wanted a win to lift spirits.
Originally, Operation Compass was just a five-day raid on Italian positions at Sidi Barani. Success quickly tempted commanders to push deeper into Libya.
Which military units were primarily involved in Operation Compass?
The Western Desert Force, led by Lieutenant-General Richard O’Connor, took charge. This group included about 31,000 British, Indian, and New Zealand soldiers.
The 4th Armoured Brigade made a big impact with its Matilda tanks. Italian weapons couldn’t get through their armor.
The 6th Australian Division stepped in for the 4th Indian Division during the campaign. Australian volunteers made their mark at Bardia in their first North African fight.
The 13th British Corps formed as operations expanded, drawing from the Western Desert Force. The 7th Armoured Division helped round up fleeing enemy troops.
On the Italian side, the 10th Army was under Marshal Rodolfo Graziani. The 23rd Italian Corps defended Bardia, led by Lieutenant-General Annibale Bergonzoli.
How did Operation Compass impact the overall course of the North African Campaign in World War II?
Operation Compass stood out as the first big Allied victory of World War II. It showed that Axis armies could be beaten—decisively, even.
The Allies smashed Italian military power in western Libya. Eight Italian divisions were knocked out of the war.
The win encouraged the Allies to keep fighting in North Africa. The campaign kept seesawing back and forth across the desert until January 1943.
Germany had to send troops to bail out Italy, pulling resources away from other fronts. That mattered more than people sometimes think.
Airfields and ports in North Africa became vital for future operations. The Allies gained perfect jumping-off points for further advances.
Can you provide a concise summary of the events that transpired during Operation Compass?
Operation Compass kicked off on December 9, 1940, with attacks on Italian camps near Sidi Barani. The Allies caught the Italians off guard by striking from behind their lines.
In just three days, Italian forces lost 38,000 prisoners. The Allies took 237 guns and 73 tanks, suffering only 624 casualties themselves.
Bardia fell on January 5, 1941, after some fierce fighting. Another 38,000 Italians were captured, along with 500 guns and 120 tanks.
Tobruk surrendered on January 22 after heavy artillery and tank attacks. The Allies had the port back within two days.
At Beda Fomm on February 7, 1941, the final blow landed. The Italian 10th Army was finished, with 25,000 more prisoners taken.
What role did British and Commonwealth forces play in the success of Operation Compass?
British troops brought experienced leadership and better equipment to the field. Lieutenant-General O’Connor had seen action in World War I and in India.
The Royal Air Force provided vital air support throughout the campaign. RAF planes hammered Italian supply lines and defensive positions.
Australian troops fought impressively at Bardia. In one wild episode, an Australian officer and eight men captured 2,000 Italians hiding in a cave.
Indian forces joined early battles before heading to Sudan. New Zealanders also fought as part of the Western Desert Force.
The Royal Navy backed up ground operations by shelling enemy positions from the Mediterranean. Naval vessels coordinated attacks on coastal targets, adding another punch to the Allied assault.
What were the main outcomes and significance of Operation Compass to the Allies and Axis powers?
The Allies captured more than 138,000 Italian and Libyan prisoners during the campaign. That huge number created headaches for logistics, but it also took a massive chunk of enemy troops out of the war.
Italian military power in North Africa basically collapsed. The operation wiped out most of Italy’s tanks, guns, and aircraft in the region.
Britain finally grabbed its first major land victory against Axis forces. This win gave Allied morale a much-needed boost after those early defeats.
Allied forces pushed forward 500 miles across the desert. They seized strategic ports and airfields along the way.
Germany had to send Afrika Korps troops to bail out Italy. That move stretched German resources even thinner across different fronts.
The campaign showed that modern desert warfare really favored mobility instead of digging in. Tank battles sometimes covered huge distances and ended fast.
References and literature
Krieg der Panzer (Piekalkiewicz)
Chronology of World War II (Christopher Argyle)
Der Grosse Atlas zum II. Weltkrieg (Peter Young)
The Desert War (Andrew Kershaw, Ian Close)
Der 2. Weltkrieg (C. Bertelsmann Verlag)
Zweiter Weltkrieg in Bildern (Mathias Färber)